
Create Your Own Wooden Puzzle Box: Step‑by‑Step Guide for Beginners
Introduction
Wooden puzzle boxes blend craftsmanship with brain‑teasing fun. Whether you want a custom gift, a decorative piece, or a new hobby, the process is entirely doable for beginners. In this guide we break down every stage—design, cutting, assembly, and finishing—so you can create a functional, beautiful puzzle box with confidence.
Materials & Tools You’ll Need
Wood
- 3/8″ (9.5 mm) Baltic birch plywood or clear maple—flat grain reduces warping.
- Optional decorative veneer (walnut, cherry) for the exterior.
Basic Tools
- Scroll saw or coping‑saw (for precise internal cuts)
- Fine‑toothed handsaw or table saw (to cut outer panels)
- Drill with 1/8″ (3 mm) and 3/16″ (5 mm) bits
- Wood glue (Titebond II or similar waterproof glue)
- Clamps (6‑inch bar clamps work well)
- Sandpaper (80, 120, 220 grit)
- Small block chisel (½″) and mallet
- Ruler, combination square, and pencil
- Safety gear – safety glasses and ear protection
Finishing Supplies (optional)
- Mineral oil or Danish oil for a food‑safe finish
- Beeswax polish for a low‑sheen look
- Laser‑etched or painted logo (if you want a personal touch)
Understanding the Puzzle Box Mechanism
The classic “sliding‑panel” puzzle box uses a secret movement—usually a hidden slide or a rotating panel—to open. For beginners we recommend the “slide‑out drawer” style because it requires only one moving piece and no metal hardware.
- Key principle: A thin internal “key” piece must be displaced before the lid can be lifted.
- Why it works: The key locks the lid in place; moving it creates a gap that releases the latch.
Once you grasp this concept, the same technique can be adapted to more complex designs later.
Step 1: Designing Your Box
Start with a simple 3 × 3 × 3 inch cube. Sketch the layout on graph paper or use a free CAD program (e.g., SketchUp Free).
- Draw the six faces as separate squares.
- Mark a ½‑inch “key slot” on the front face—this will become the hidden slide.
- Identify the “drawer” panel (usually the bottom) and a “catch” piece on the side.
- Label each piece (A‑F) to avoid confusion during cutting.
Save your drawing as a PDF; you’ll reference it while measuring and cutting.
Step 2: Cutting the Wood
Precision is the foundation of a smooth‑operating puzzle box.
- Measure twice, cut once. Transfer each panel’s dimensions from your sketch to the plywood using a ruler and pencil.
- Use a table saw or circular saw to rip the stock into 3‑inch strips.
- Cut each strip to the exact length for faces A‑F (typically 3 inches).
- For the internal key slot, set the scroll saw blade to 1/8″ and cut the groove according to your design.
Check every cut with a square; uneven edges will cause binding later.
Step 3: Shaping the Pieces
Fine‑tune the edges and create the hidden channel.
- Sand the outer faces with 120‑grit sandpaper to remove saw marks.
- Use the block chisel to clean up the key slot, ensuring the width is uniform (≈ ⅜″) and the depth is ¼″.
- Round the outer corners lightly with 220‑grit sandpaper for a professional look.
Step 4: Assembling the Box
Glue the six panels together without the moving parts first; this creates a solid “shell.”
- Apply a thin bead of wood glue along the inner edges of one side panel.
- Press the adjoining panel firmly and clamp for 30 minutes.
- Repeat for the remaining five joints, keeping the box square.
- Wipe away excess glue with a damp cloth before it dries.
After the glue cures, you’ll have a sturdy cube ready for the puzzle mechanism.
Step 5: Installing the Sliding Mechanism
Now add the only moving component—the key slide.
- Cut a thin slat (≈ ″ × ⅜″ × 3 in) from the same plywood; this will be the “key” piece.
- Fit the slat into the pre‑cut channel on the front face. It should slide freely but not wobble.
- Secure the bottom of the channel with a shallow mortise (using the chisel) to keep the key from falling out.
- Attach a small dowel (¼″) inside the interior side wall to act as a “catch.” When the key is displaced, the dowel releases the lid.
Test the movement: push the key slide a few millimetres, then lift the lid. If the lid remains locked, adjust the dowel position by 1‑2 mm until it releases smoothly.
Step 6: Finishing and Decorating
A good finish protects the wood and enhances the puzzle’s tactile feel.
- Sand the entire box with 220‑grit sandpaper—final surface should feel like glass.
- Apply two coats of mineral oil, letting each soak for 15 minutes before wiping excess.
- Optional: rub a thin layer of melted beeswax for a satin sheen.
- If you want a hidden clue, laser‑engrave a tiny symbol on the inside of the lid (you can do this at most local makerspaces).
Let the finish cure 24 hours before handling the puzzle.
Practical Tips & Common Mistakes
Tips for Success
- Work in a well‑ventilated area. Dust and fumes can irritate lungs and eyes.
- Use a pin vise to drill precise starter holes for the key slot.
- Mark the “front” and “back” of each panel with a pencil before gluing to avoid orientation errors.
- Test the sliding mechanism after each glue‑up step; it’s easier to adjust early.
Common Mistakes to Avoid
- Cutting the slot too wide. The key will wobble and the lid may not lock.
- Skipping the final 220‑grit sand—rough surfaces create friction and wear the glue.
- Using excessive glue, which can seep into the slide channel and cause jamming.
- Clamping too tightly; it can warp thin plywood and misalign the mechanism.
Safety Checklist
- Wear safety glasses at all times.
- Secure the workpiece with clamps before cutting.
- Keep fingers clear of the saw blade; use a push stick for narrow cuts.
- Ventilate the area when applying oil or wax.
Frequently Asked Questions
Can I use a different wood type?
Yes. Hardwoods like walnut or cherry give a richer appearance but are harder to cut. Plywood is best for beginners because it stays flat and resists warping.
How thick should the wood be?
3/8″ (9.5 mm) offers a good balance between strength and ease of routing the sliding channel. Thinner material may split; thicker material requires deeper cuts.
Do I need special glue?
Use a water‑based polyurethane glue (e.g., Titebond II). It’s food‑safe once cured and holds well under the slight stress of the sliding mechanism.
Conclusion
Building a wooden puzzle box is a rewarding project that sharpens basic woodworking skills while delivering a functional brain‑teaser. By following this step‑by‑step guide—selecting the right materials, cutting accurately, and fine‑tuning the hidden slide—you’ll finish a durable, attractive box you can gift or keep for yourself. Ready to start? Gather your tools, draw your first design, and enjoy the satisfaction of turning raw wood into a clever puzzle.
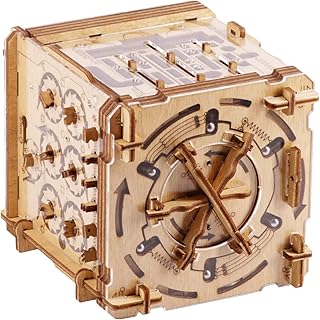
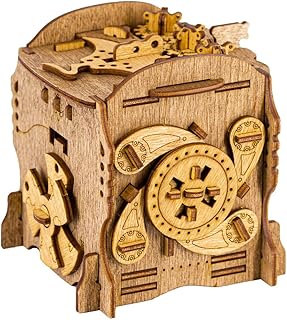
Related Amazon Products

iDventure Cluebox - The Trial of Camelot - Escape Room Game - Puzzle Box - 3D Wooden Puzzle - sequential Puzzle - 3D Puzzles for Adults - Brain Teaser - Birthday Gift Gadget for Men - Money Box
iDventure Cluebox Cambridge Labyrinth – Wooden 3D Puzzle Box – Escape Room Brain Teaser Gift – Money Puzzle Box for Adults & Men

iDventure Cluebox - Schroedingers Cat - Escape Room Game - Puzzle Box - 3D Wooden Puzzle for Adults - Treasure Gift Box - Brain Teaser - Birthday Gift Gadget for Men and Women - Money Box
iDventure Cluebox - Captain's Nemo Nautilus - Escape Room Game - Puzzle Box - Sequential 3D Puzzle for Adults - Brain Teaser - Birthday Gift Gadget for Men and Women - Money Box


As an Amazon Associate I earn from qualifying purchases.