
Create a Brain‑Teasing Puzzle Box in 5 Easy Steps with Household Items
Looking for a hands‑on activity that sharpens logic skills and entertains friends? You can build a fully functional puzzle box using only items you already have around the house. This step‑by‑step guide walks you through the process, offers practical tips, and even suggests variations for extra challenge.
What You’ll Need
All of the materials listed below are common household staples. No special tools or purchases are required.
- Sturdy cardboard (single‑wall or double‑wall corrugated)
- Scissors or a utility knife
- Strong packing tape or masking tape
- Rubber bands (medium‑strength)
- Popsicle sticks or wooden stirrers (optional for added rigidity)
- Paper clips (straightened)
- Glue gun or PVA glue
- Markers or decorative paper (for finishing)
Step‑by‑Step Construction Guide
Step 1 – Design the Box Layout
Sketch a simple box on paper first. A classic 4×4×4 inch cube works well because:
- It’s large enough for hidden mechanisms.
- It fits comfortably in most hands.
- Measurements are easy to replicate with a ruler.
Mark the dimensions on the cardboard: four sides, a top, and a bottom.
Step 2 – Cut and Assemble the Frame
Using scissors or a utility knife, cut the pieces precisely. Then:
- Attach the side panels to the bottom with tape, forming a shallow tray.
- Secure the top panel loosely—leave a 0.5 inch gap on one edge where the puzzle mechanism will hide.
Make sure the edges line up cleanly; a tight seam prevents the box from wobbling when solved.
Step 3 – Create the Secret Latch
The core of any puzzle box is a hidden latch. Here’s a reliable, low‑tech option using a rubber band and a paper‑clip trigger:
- Attach a rubber band across the interior of the box, anchoring each end to opposite side panels with hot glue.
- Straighten a paper clip and bend it into a small “L” shape.
- Mount the paper‑clip latch on the interior wall so that when it slides under the rubber band, the band releases and the top panel pops open.
- Cover the latch with a decorative sticker or painted panel to keep it invisible.
Step 4 – Reinforce with Popsicle Sticks (Optional)
If you want added durability, glue popsicle sticks along the inside corners. This reinforces the box without altering the puzzle mechanism.
Step 5 – Test, Refine, and Decorate
Before showing off your creation:
- Close the box and try to open it using the hidden latch. Adjust the rubber band tension if it’s too stiff or too loose.
- Check that the top panel only opens when the latch is correctly aligned.
- Paint, wrap in decorative paper, or add stickers to personalize the box.
Practical Tips for a Smooth Build
- Measure twice, cut once. Small errors compound when assembling the frame.
- Use a ruler or straight edge. This ensures the rubber band sits perfectly straight.
- Heat‑shrink the paper clip (optional). Briefly heating the metal with a lighter can bend it into a more precise shape.
- Safety first. Work on a surface that can tolerate glue or tape residue, and keep scissors away from children.
- Document the mechanism. Take photos of each step so you can troubleshoot or recreate the box later.
Variations to Increase Difficulty
Once you’ve mastered the basic design, experiment with these ideas:
- Multiple hidden releases. Add a second rubber‑band latch that must be triggered in a specific order.
- Magnet locks. Substitute a small neodymium magnet for the rubber band to create a magnetic “catch.”
- Code panels. Attach a paper‑cut number wheel that aligns only when the correct sequence is entered.
- Weighted base. Insert a small sandbag or coins to make the box heavier, changing the feel of the puzzle.
Conclusion
Creating a brain‑teasing puzzle box from household items is an affordable, hands‑on project that blends creativity with logical problem‑solving. By following the five easy steps—design, assemble, build a secret latch, reinforce, then test and decorate—you’ll have a functional puzzle that can impress friends, reward kids, or serve as a unique gift. Feel free to customize the difficulty level with the variations above, and most importantly, enjoy the satisfying “aha!” moment when the hidden mechanism finally clicks.
Related Amazon Products
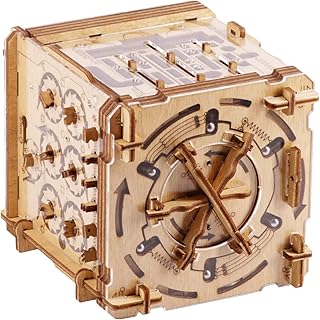
iDventure Cluebox Cambridge Labyrinth – Wooden 3D Puzzle Box – Escape Room Brain Teaser Gift – Money Puzzle Box for Adults & Men
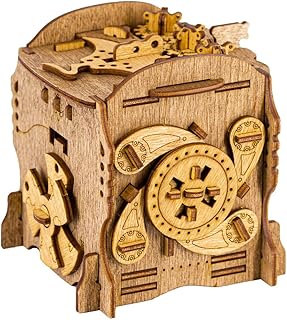
iDventure Cluebox - Captain's Nemo Nautilus - Escape Room Game - Puzzle Box - Sequential 3D Puzzle for Adults - Brain Teaser - Birthday Gift Gadget for Men and Women - Money Box

Puzzlup Stackable Puzzle Trays with Box Display Design - Set of 6 Unique Puzzle Sorting Trays - Up to 1500 Pieces - Premium Jigsaw Puzzle Accessory

Enigma Decode Secret Puzzle Box - Money and Gift Card Holder in a Wood Magic Trick Lock with Two Hidden Compartments Brainteaser


As an Amazon Associate I earn from qualifying purchases.