
How to Build Your Own Wooden Puzzle Box: Step‑by‑Step DIY Guide
Wooden puzzle boxes are a satisfying blend of craftsmanship and brain‑teasing fun. This hands‑on guide shows you how to design, cut, assemble, and finish a functional puzzle box using basic woodworking tools. Follow each step, and you’ll have a custom gift or personal treasure chest in just a few afternoons.
Materials & Tools
Wood
- Hardwood preferred: maple, walnut, cherry, or birch (denser than pine and holds joints better).
- Thickness:
½‑inch (12 mm)board works for most beginner designs. - Grain direction: keep it consistent for a smooth finish.
Hardware
- Wood glue (Titebond III or similar waterproof glue).
- Fine‑grain sandpaper (220‑400 grit).
- Finish: Danish oil, polyurethane, or a water‑based lacquer.
Essential Tools
- Table saw or circular saw with a fine‑tooth blade.
- Router with a
1/8‑inchstraight bit (for internal slots). - Drill/driver set (for pilot holes).
- Clamp set (minimum 4 clamps, 6‑inch length).
- Marking gauge, carpenter’s square, and a pencil.
- Chisel set (⅜‑inch and ½‑inch) for fine adjustments.
Planning Your Puzzle Box Design
- Choose a mechanism. Beginner boxes use a simple “sliding drawer” or “twist‑lock” design. More advanced puzzles add false panels or hidden magnets.
- Sketch the layout. Draw each side on graph paper (1 mm = 1 mm). Include slots, hinges, and the secret opening.
- Calculate dimensions. Typical sizes:
- Small: 3 × 3 × 2 in (≈ 7.5 cm cube)
- Medium: 5 × 5 × 2 in (≈ 12.5 cm cube)
- Large: 7 × 7 × 2 in (≈ 17.5 cm cube)
- Make a cut‑list. List each panel (top, bottom, sides, internal plates) with length, width, and any slots to be routed.
Cutting and Shaping the Pieces
Step 1: Mark and Cut Panels
- Set your table saw fence to the required width and cut all panels from the hardwood board.
- Check each piece for squareness with a carpenter’s square; discard or re‑rip if out of tolerance (> 0.3 mm).
Step 2: Route Slots & Pockets
- Secure a panel on the router table.
- Set the router depth to match the thickness of the mating piece (usually
½‑inchboard →¼‑inchslot). - Follow the sketch lines precisely; use a sacrificial backer board to protect the router collet.
- Test fit with a dry run before gluing.
Step 3: Refine with Chisel
If the router leaves a rough edge or the slot is narrow, use a sharp chisel to clean the bottom. Work from the center outward to avoid splitting the grain.
Assembling the Mechanism
- Dry‑fit all parts. Ensure each slot aligns and the moving panel slides freely.
- Apply glue sparingly. Use a brush to spread a thin bead on slot edges only; excess glue can jam the mechanism.
- Clamp strategically. Place clamps on the outer faces, not across the moving parts. Use rubber pads to protect the wood surface.
- Let cure. Follow glue manufacturer’s minimum open time (usually 30 min) and full cure (24 h) before handling.
- Check movement. The secret panel should open with a single smooth motion—no binding.
Finishing Touches
- Sand the exterior. Start with 220 grit, progress to 400 grit for a silk‑smooth finish.
- Apply finish.
- For a natural look: 2–3 coats of Danish oil, light sanding between coats.
- For durability: 2 coats of water‑based polyurethane, sanding with 320 grit between coats.
- Optional embellishments. Engrave a monogram, add a leather strap, or install a tiny magnet for a hidden “click” seal.
- Final test. Place a small item inside, close the box, and verify that the puzzle still resolves smoothly.
Practical Tips & Common Mistakes
- Measure twice, cut once. A 0.5 mm error in a slot can prevent the whole mechanism from working.
- Use scrap wood. Test routing depth on a spare piece before cutting the actual panel.
- Don’t overtighten clamps. Excess pressure can crush the wood fibers and cause slot distortion.
- Avoid water‑based glues for a puzzle box that will see frequent handling. They can weaken over time.
- Keep the grain direction consistent. This reduces warping and helps the finish look even.
- Finish before final assembly only if the internal mechanism is simple. Complex puzzles are easier to assemble first, then finish the exterior.
Frequently Asked Questions
What wood is best for beginners?
Maple and birch offer a balance of hardness and workability. They cut cleanly and hold glue well.
Can I use a CNC router instead of a hand router?
Yes. A CNC can improve slot precision, especially for intricate designs, but ensure the toolpath includes proper relief to avoid tight fits.
How thick should the wood be for a secret compartment?
At least ½‑inch (12 mm) provides enough rigidity for moving panels while still being manageable on a standard table saw.
Do I need to seal the interior?
If you plan to store moisture‑sensitive items (e.g., jewelry), apply a thin coat of oil inside the box to protect against humidity.
How long does the whole project take?
For a basic 5‑inch box:
– Cutting & routing: 1‑2 hours
– Assembly & glue cure: 3‑4 hours (including drying)
– Finishing: 2‑3 hours
Total: 6‑9 hours (can be split over two days).
Conclusion
Building a wooden puzzle box combines precise woodworking with creative problem‑solving. By selecting the right wood, planning each cut, and respecting glue‑up and finishing stages, you can craft a functional, beautiful box that delights both the maker and the user. Use the step‑by‑step process above, adapt the design to your skill level, and enjoy the satisfaction of a puzzle that you built from scratch.
Related Amazon Products
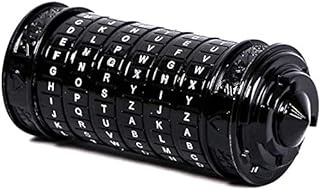
Cryptex Da Vinci Code Mini Cryptex Lock Puzzle Boxes with Hidden Compartments Anniversary Valentine's Day Romantic Birthday Gifts for Her Gifts for Girlfriend Box for Men

iDventure Cluebox - The Trial of Camelot - Escape Room Game - Puzzle Box - 3D Wooden Puzzle - sequential Puzzle - 3D Puzzles for Adults - Brain Teaser - Birthday Gift Gadget for Men - Money Box
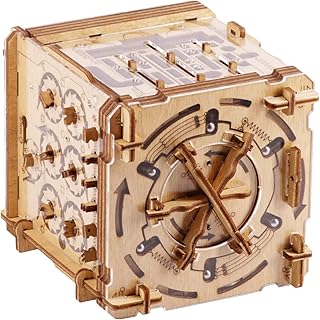
iDventure Cluebox Cambridge Labyrinth – Wooden 3D Puzzle Box – Escape Room Brain Teaser Gift – Money Puzzle Box for Adults & Men

Funnybox Red Kimono Beauty Paintings by Haruyo Morita- Wooden Jigsaw Puzzles 1000 Piece for Teens and Family


As an Amazon Associate I earn from qualifying purchases.